

Taking a Print File - and Creating a Slide With Its Components
I need to make sure I do “Accessing Prior Knowledge,” so I’ll navigate to that section in the Engage tab. On the side of the page, you’ll find Editable Google Files and Print Files. I’m going to use the Print Files for this step.

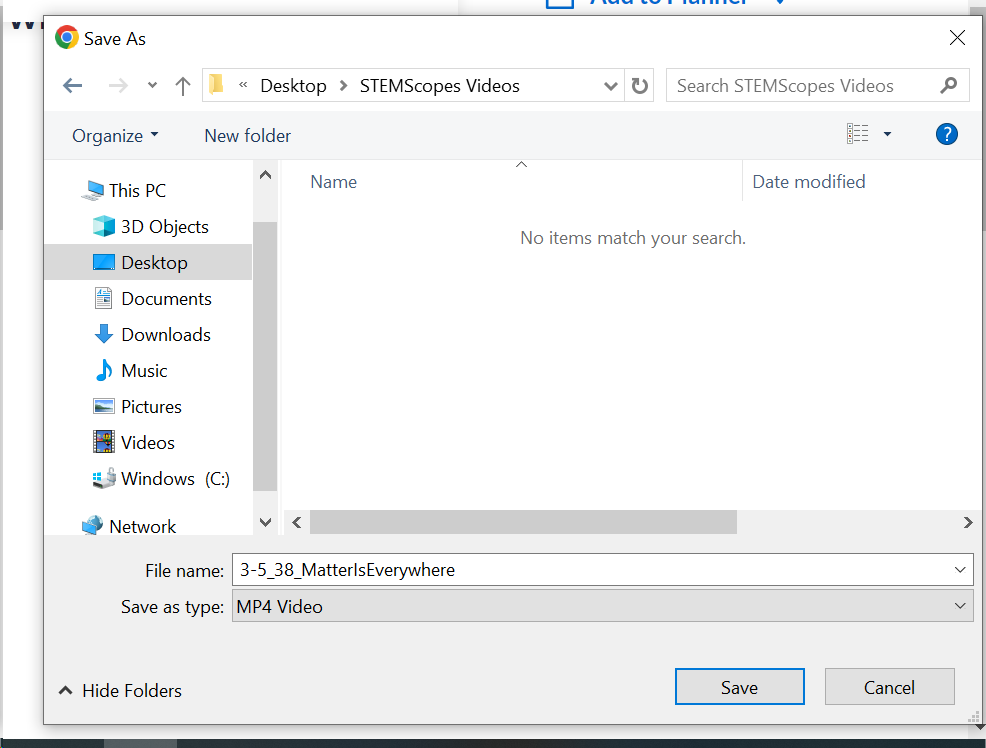
The file will open a new tab. Save the file to your computer. It will automatically have a name like “NGSS3D_5_MatterisEverywhere_ENGAGE_APK_StudentHandout” - I do like that the name of the scope is in it, but it’s a long file name, so feel free to change it to what makes sense for your organizational system.
In Canva, start a blank presentation or go into your existing presentation. To start a new presentation, click “Presentation” on the homepage of Canva.

The odd thing here is that a file will not pop up in Uploads once the upload finishes. Weird, right? Instead, it’s considered a “project.” So, click the Projects tab to find that file! This is also where you can find materials in other projects you’ve created - a great way to avoid duplicating your work!
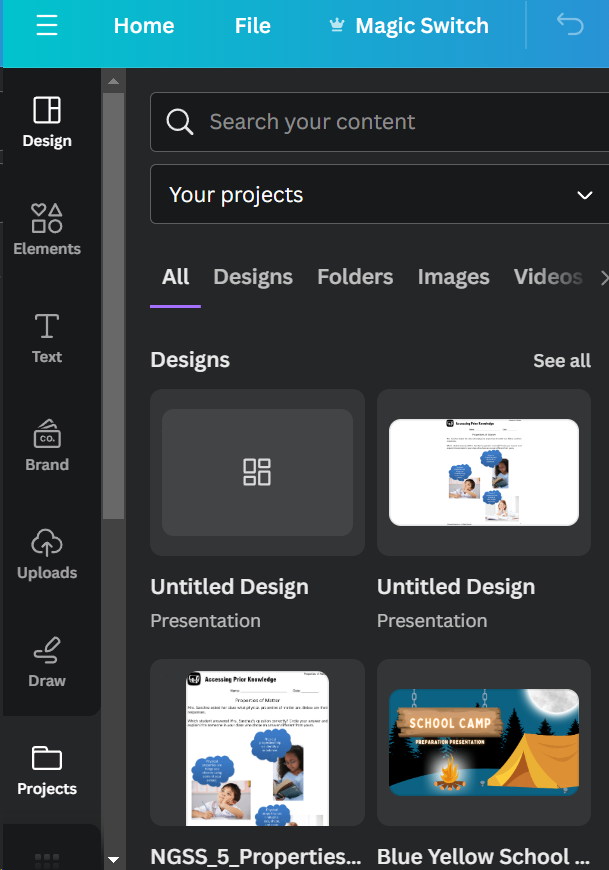
Find your file in this section and click on it. It will pop on to the slide you’re currently on. Here’s the cool bit - since you did it this way instead of taking a screenshot from STEMScopes, you can move and edit the text and components as though they were created within the slide.
Here is the slide right after I uploaded the file:
 Downloading a STEMScopes Video and Uploading to Canva
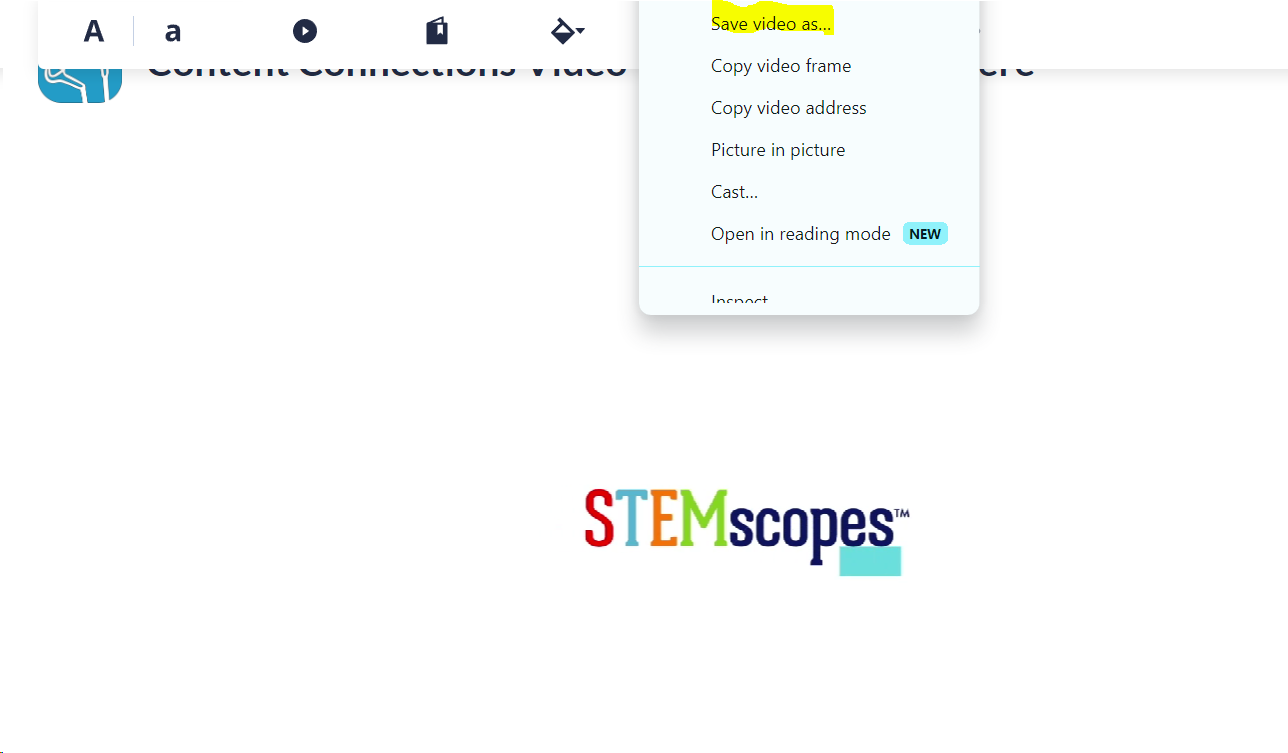
Find the video you want to add to your presentation. In this case, I’ll be adding a Content Connections Video to my slides for this lesson. When you find the video you would like to use, start to play the video (I usually play long enough to see the STEMScopes logo) and then pause. Once the video is paused, right click on the video and you’ll see an option to “Save Video As…” Select this and save the video in the folder that works for your organizational system.
Find your file in this section and click on it. It will pop on to the slide you’re currently on. Here’s the cool bit - since you did it this way instead of taking a screenshot from STEMScopes, you can move and edit the text and components as though they were created within the slide.
Here is the slide right after I uploaded the file:
And here is that slide after I made some edits:
Downloading a STEMScopes Video and Uploading to CanvaFind the video you want to add to your presentation. In this case, I’ll be adding a Content Connections Video to my slides for this lesson. When you find the video you would like to use, start to play the video (I usually play long enough to see the STEMScopes logo) and then pause. Once the video is paused, right click on the video and you’ll see an option to “Save Video As…” Select this and save the video in the folder that works for your organizational system.
In Canva, use the Upload option on the left side to upload the video file to your presentation.
The file is under the “Video” tab. You can see all other videos you may have uploaded here as well as the length of the video. Click the video to add it to the slide you’re currently on. For some reason, these videos like to play automatically when you progress to the slide they’re on. But good news - you can change that! Click on the video and look in the toolbar. You’ll see a few options here to edit. Select playback. This is where you can toggle both “Play on repeat” and “Play automatically.”

This process can be used to insert other forms of media into your slides, including videos, images, PDFS, and Powerpoint files. You can use the download steps to help you get the files for Google Slides or other presentation programs you prefer.
I also recommend searching existing projects in Canva. They may already have a presentation (or other material) connected to your standards!
Feel free to email me with any questions.
.jpg)
Comments
Post a Comment